
A term which tends to pop up fairly enough among photographers is ‘metadata’. So, what is metadata? In simple words, metadata is information about data: file size, date created, author, etc, are some very basic examples of metadata found in every digital file. Similarly, metadata in photography is information about a photo.
Metadata in Photography
When you look through the Properties of any photograph, whether they’re from your digital camera or your phone, all the information you see about it constitutes its metadata. Metadata in photography includes key information like file dimensions, file size, camera maker, ISO, keywords, etc.

It’s pretty similar to a doctor looking at your history file, except you’re the doctor now, the photo is your patient and the metadata is the history file.
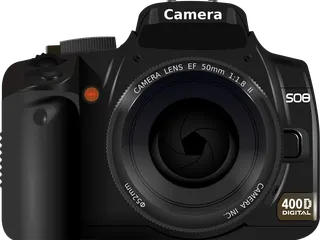
Metadata is very telling information which helps in finding and working with particular instances of data, should the need for it ever arise.
Metadata in Lightroom
Very important bits of data are automatically embedded into photographs, which include things like camera model, lens used, f-stop, etc. Did you know you can also add a personal touch to this metadata?
Enter! The Metadata panel in Lightroom!

You can also view some of this metadata in Loupe view (in the top left corner) if you’ve enabled the Info Overlay.

You can cycle through the two different metadata sets in the Info Overlay by pressing the ‘I’ key.
Before we dive into the Metadata panel, you should know there are 2 types of metadata in Lightroom:
- Metadata which cannot be changed
- Metadata which can be changed
1. Data which cannot be changed
Most information which comes embedded in a photo, like information about the camera, lens and the settings you used, is sacred and therefore untouchable.

The only thing that you probably can change in this is the Capture Time. We go over that in our blog post called 6 Secrets about Lightroom You Didn’t Know. All the other information that came embedded with the photo, no matter what you try, you can’t change this metadata.
2. Data which can be changed
Metadata like copyright, title, ratings, basically things which you yourself enter is editable metadata. In the Metadata panel, you can recognize editable data by the empty text boxes next to their field names.

How to add Metadata to Multiple Photos in Lightroom
Lightroom exists to serve photographers, so if you’re thinking you have to manually enter metadata for each individual photo, of course there’s an easier way.
There are 3 different ways you can add metadata to your photos:
- Grid view
- Filmstrip
- During Import
1. Grid View
In the Library module, you’ll find the Metadata panel on the right side.
Adding metadata through the Grid view is the simplest and most straight-forward way to do it.
Step 1 – Select Folder
Select the folder you want to add metadata to from the Folders panel on the left side.
Step 2 – Select Photos
Then select all your photos (Ctrl +A) in Grid view.
If you only want to select a handful of photographs placed together you can do so by selecting the first photo, press the Shift key, and then click on the last photo. This selects all the photos between the first and second selection.
If you want to select random photos from here and there (but they have to be within the same folder), hit the Ctrl key and start selecting them.
Step 3 – Enter Metadata
Once you select your photos, move over to the Metadata panel and fill in where appropriate. You can enter a copyright, title, creator name and anything else you feel the need to.

This automatically applies all the entered metadata to all the selected photos.
2. Filmstrip
If you’re not in the Grid view and would rather prefer the Loupe view, you can work with the Filmstrip to add metadata to your photos. But you have to be a little careful since this method doesn’t apply metadata to all the selected photos immediately.
Step 1 – Select Photos
This is similar to how you selected your photos in the Grid view, just that now you’re doing it on the Filmstrip. You can Select All, or use Ctrl or Shift as you need on the filmstrip below.
Step 2 – Enter Metadata
Again, simply enter the metadata you need in the Metadata panel.
Step 3 – Sync
Now comes the new part.
All the metadata you’ve entered has only been applied to the active photo you see in your Loupe view. To apply it to all the selected photos, you need to turn on the toggle switch next to the Sync button. This will turn on the Auto Sync.

Any metadata you add now will automatically apply to all the photos you select.
3. During Import
When you’re importing your photos, you can apply any metadata preset from the Apply During Import panel.

This saves you time from entering the same metadata over and over again into photos each time you import a new shoot. However, for this one you need have a metadata preset.
Let’s see how to make these time saving presets.
How to Create Metadata Presets in Lightroom
At the top of the Metadata panel is a Preset dropdown menu.


Select Edit Presets to open the Edit Metadata Presets dialogue box.

If you’ve already filled out metadata in the selected photo, the dialog box will have those textboxes already filled up.

You can edit this information and add to other fields as well.
Point to Note:
There are checkboxes at the end of each textbox. This shows which information is saved in a preset.
If you select a checkbox in the Edit Metadata Preset dialog box and then leave it empty, it will erase the information that you may have filled out in the same field in the Metadata panel. So, be sure not to leave your textboxes empty if you’ve checked them.

Once you’re done, open the Preset dropdown near the top and select Save Current Settings as New Preset.

A dialog box will open up asking you to name your new preset.

Type the new name and click Create.
Don’t forget to click Done on the Edit Metadata Presets dialogue!
You can find your new preset ready to use in the Preset dropdown menu.

Now all you have to do is select your photos and then this preset, and you will have applied everything you wanted within a few clicks!
A Metadata Must: Copyrights
Many, if not all, professional photographers add copyrights to their metadata. This is one of the greatest advantages of metadata in photography, since you can add details for people to be able to trace your work back to you.
So when you’re filling copyright information, be sure to change the Copyright Status from Unknown to Copyrighted. You can even add an email or website for people to be able to look you up on the internet or contact you.

How to Edit Metadata Presets
If you’ve made some error or want to add new information to an existing preset, don’t start from scratch again! Know that Lightroom’s got you!
To update or edit your preset, head back to the Preset dropdown menu and click Edit Presets.

In the dialog box, click the Preset dropdown on the top and select the preset which you want to edit.

This will open the preset you created and now you can change anything you want.
The next step is to go back to the Preset dropdown and select Update Preset “whatever-name-you-gave-it”.

And you’re done! Simple as that!
BECOME A LIGHTROOM NINJA!

GET CONFIDENT WITH LIGHTROOM
THE COMPLETE LIGHTROOM COURSE
Learn how to use Lightroom to get organized, create amazing photos and cut your editing time in half.
Using Metadata to Search for Images
You may not have thought about it before but you can use metadata to search for photos as well.
Using metadata adds a unique element to it because you can get very specific within your search, adding the type of camera or lens you used, or even other settings like ISO and exposure.
You can open the search bar by heading over to Library and select Find (or press Ctrl + F for Windows & Cmd + F for Mac).

A filter bar will open at the top.

Select Metadata on it.

It will open a variety of options for metadata for you to choose and filter through.

If you find that it lacks some metadata you were meaning to use, you can click on the icon at the top right of any column and select Add Column.

The new column will be blank.

You’ll need to click on the title of the column to open a dropdown menu. This will show you a plentiful selection of metadata fields. Just select the one you need.

You can make combinations of different metadata fields to further narrow down your searches. For instance, you can choose a specific location, camera and a specific rating. Any photos which falls under all three categories will show up.
Conclusion
One can easily overlook metadata in photography but it’s actually very powerful information. It assists in better organization and easier searching, however, it’s most popular use definitely remains in keeping ownership of your work. So whatever you’re planning to use it for, it’s definitely something worth knowing about and looking into.
DOWNLOAD
The Ultimate Quick Start Guide for Lightroom
If you're just getting started with Lightroom, it can seem a bit too much. Where do you even begin? In this free guide, I will take you step-by-step through the fundamentals of Lightroom so you can feel more confident.